Logging in on the Panopto Recorder: Mac
Before you can begin recording sessions with Panopto, you will need to log in. To log in:
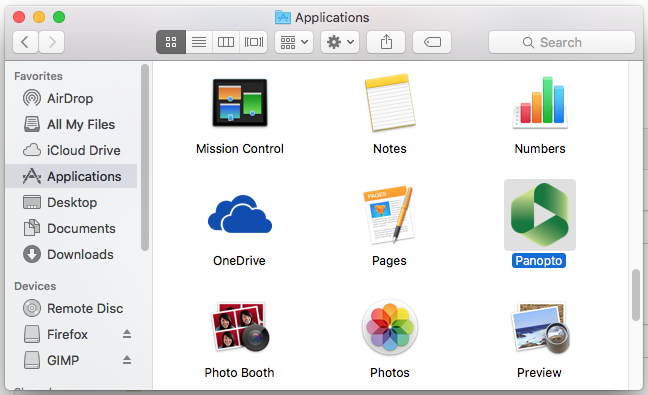
1. Under the Applications tab, find the Panopto Recorder and click on the icon to open the application.
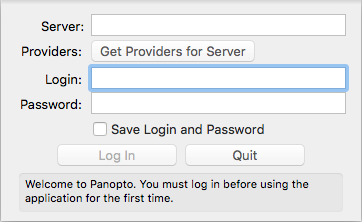
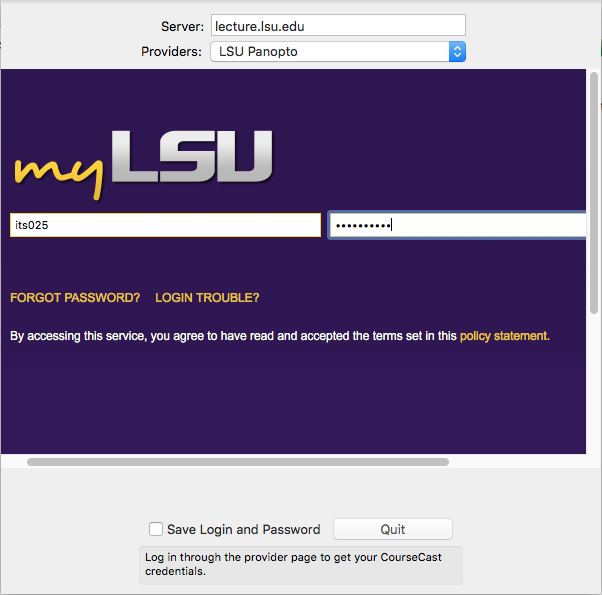
2. Upon opening the Panopto Recorder, you will need to Sign In.
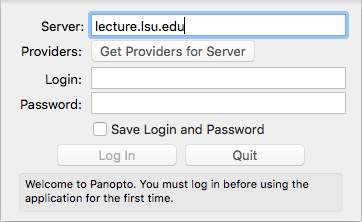
3. In the Server field, insert lecture.lsu.edu. Then select Get Providers for Server.
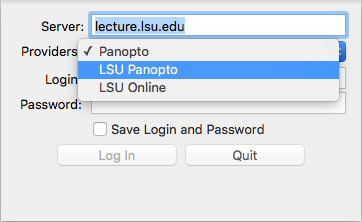
4. Under Providers, select LSU Panopto.
5. Within the Panopto Window, you will be directed to the LSU login page. Enter your MyLSU credentials. Then scroll to the right and select Login.
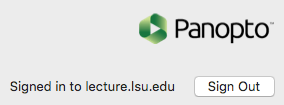
6. You are now logged into the server and are ready to record.
Recording Basics With Panopto: Mac
1. Select Create New Recording

2. Click on the Folder field and select the folder that you want to record to.
NOTE: For LSU faculty, the folder will be the name of your Moodle course that you provisioned. To change folders, click on the folder field and all of your folders will appear. By default, the recorder will open to the last known good configuration of recording devices. If you have recorded before, then the same devices will be automatically chosen.

3. In the session field (the session field will be the title for your recording) give your recording an appropriate title.
NOTE: By default, the session name will be the date and time that you make the recording. It is recommended to give your recording an appropriate title before recording, but you can go back and change the name. See the following article: Panopto: Changing a Recording's Title.

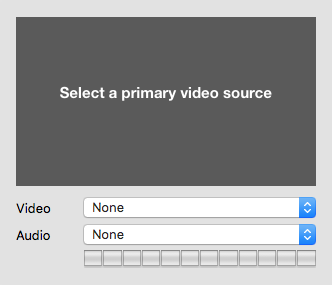
4. Select the inputs that you want to record.
NOTE: you can record from multiple inputs by selecting the checkbox next to the input. These inputs include the following: Slides (including PowerPoint & Keynote), your computer screen, an audio feed, and video source.
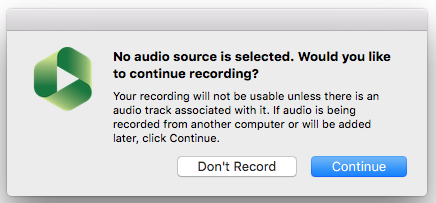
NOTE: Audio and/or video is required for all recordings to complete and to be posted to the web. You will receive a pop up error message if no audio/video is selected when recording.
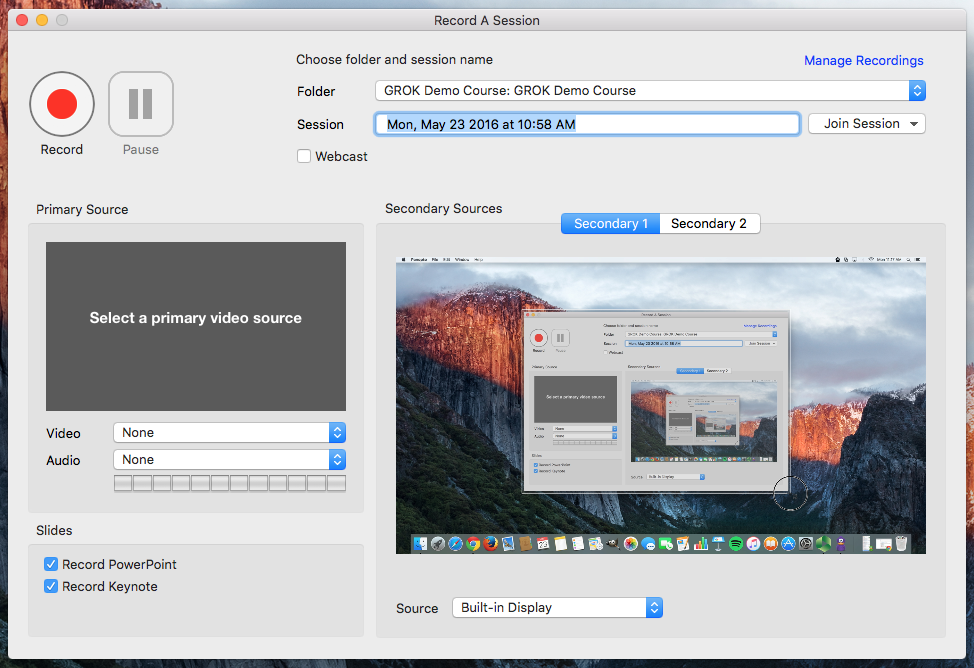
5. To change a video or audio source on any of the inputs, click on the up/down arrows by the Video or Audio option.
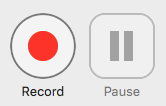
6. After selecting the appropriate inputs, begin the recording by clicking on the Record button.
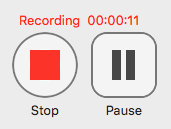
7. When finished with recording, to stop, select the "Stop Recording" button.
NOTE: To the right of the "Stop Recording" button, the amount of time that the recording has lasted will be displayed.
8. The next screen will show that status of the recordings.
NOTE: By default the Mac Recorder will automatically upload the recorded content to the server. To preview the recording, in the "Preview" area if "Audio." "Video," or "Screen Capture" was recorded. If the preview is not satisfactory, you can choose to "Pause upload" which will pause the upload of the files to the server.
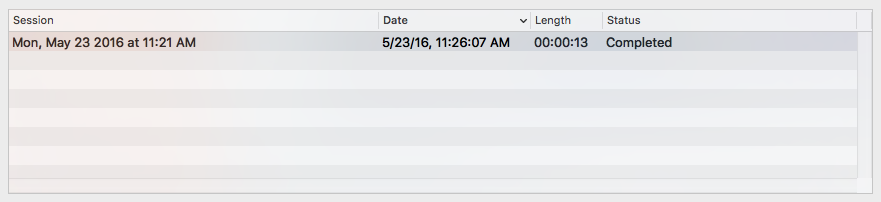
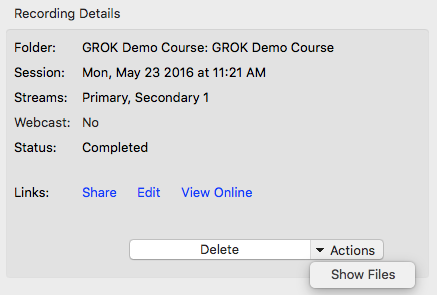
9. The Recording Details section has two options. "Show Files" or "Delete" (will show or delete the local files in the Panopto Recordings directory).
Referenced from: Panopto Support