Panopto: Taking Notes
This article has not been updated recently and may contain dated material.
Taking Notes with Panopto:
1. Log in to the LSU Panopto Web Portal via Moodle or directly from the LSU Panopto Web Portal login page.
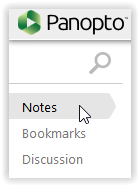
2. Click the "Notes" link is on the left hand side. (location depending on the streams captured)

3. Once expanded a field to enter notes will display. NOTE: Your timestamp starts the second you start typing.
4. Hit Enter/Return to submit the note into the field above.
5. To edit/delete a submitted note, click on the note you wish to change and click either edit or delete. (Timestamp remains the same after editing as well)

6. To change view of notes, select "Make public" above the Notes field.
NOTE: By default notes under your username will be private notes viewable only to you.

7. To take notes in a channel by either selecting or creating a channel, click on the drop down menu above note's field. (Useful to collaborate your notes with groups!)

8. Create a channel by clicking the "Join a channel" option and type the name of the channel you wish to join or create. (Share the channel name to add others into sharing!)
9. To create Live notes, find a session that is currently being recorded.
10. Highlight the session you wish to take live notes for and select the "Take Notes" option below the session name.

11. A new window will open where you can take notes. (Notes are time-stamped and aligned with the recorded session for later use).
Referenced from: Panopto Support
17460
12/6/2023 3:28:18 PM